
Leaks can lead to significant damage in your home, making a thorough roof inspection for leaks an important task every homeowner should undertake. By performing DIY roof inspections, you can save money and catch potential issues before they escalate. In this step-by-step guide, you will learn how to systematically check for leaks, identify problem areas, and take control of your home’s maintenance. Follow these guidelines to ensure your roof stays in top shape and protect your property from the perils of water damage.
See also: Understanding The Process Of A Roof Inspection By Drone – Step-by-Step Overview
Table of Contents
Preparation is Key
For an effective roof inspection for leaks, adequate preparation is vital. Ensure you gather all necessary tools and conduct a weather check before you start. Learn more about vital steps in the (5 Tips For A Roof Inspection). Planning ahead can save you time and effort, making your inspection process smoother.
Essential Tools and Equipment for a Thorough Inspection
There’s a variety of tools that can enhance your roof inspection for leaks. You should have a sturdy ladder, a flashlight, safety goggles, gloves, and a digital camera to document any issues you encounter. Additionally, a moisture meter might come in handy to detect unseen leaks. Ensuring you have the right equipment will provide you with a safer and more comprehensive inspection.
Tips for Choosing the Right Time and Conditions for Inspection
With proper timing, your roof inspection for leaks can be more effective. Schedule your inspection on a clear day, ideally after rainfall, as this will make it easier to spot any leaks. Avoid conducting inspections during stormy weather or at night. Here are some key tips to consider:
- Check weather forecasts
- Inspect after heavy rain
- Choose daylight hours
- Be mindful of temperature
The right conditions will ensure a thorough and safe inspection.
Thorough planning involves more than just timing; you also want to ensure safety and visibility during your inspection. Regularly checking your local weather conditions can be beneficial, providing you with insights on the best days to perform your DIY roof inspections. Additionally, establishing a routine for regular checks can prevent minor issues from developing into serious leaks. Furthermore, make sure to have a spotter with you when using a ladder on your roof.
- Inspect during daylight
- Avoid windy conditions
- Inspect in mild weather
- Consider roof accessibility
The more thoughtful you are about when and how to conduct your inspection, the more effective it will be.
Identifying Potential Leak Sources
You may find that identifying potential leak sources during your roof inspection for leaks is vital for preventing costly repairs. Look out for areas with visible damage, as well as spots where water might infiltrate. Inspecting these regions regularly can help you maintain the integrity of your roof and ensure lasting protection for your home.
Common Areas Prone to Leaks and How to Inspect Them
Little details can make a significant difference when inspecting for leaks. Focus on areas such as:
- roof flashings
- valleys
- vent pipes
- shingle edges
Examine these spots carefully for any signs of damage or wear that might indicate a leak.
Factors to Consider When Evaluating Roof Age and Condition
Sources of potential leaks often correlate with the age and condition of your roof. Pay attention to:
- material durability
- local climate
- overall maintenance history
The condition of your roof will impact your DIY roof inspections and help you pinpoint more accurately where issues may arise.
When you consider the factors affecting roof age and condition, examine how environmental stressors like wind and rain contribute to your roof’s wear and tear. Check how weather conditions might accelerate deterioration, especially in older roofs. Understanding the lifespan of your roofing materials and the level of your previous maintenance efforts will be invaluable during your roof inspection for leaks. The knowledge you gain here will make your inspections more effective.
Conducting a Visual Inspection
While performing your roof inspection for leaks, begin with a thorough visual examination of the entire surface. Look for any glaring issues such as missing shingles, cracked tiles, or areas that appear discoloured. Use binoculars if necessary to spot high-up details, and don’t forget to check the gutters and downpipes for any debris that might indicate potential problems. Keeping an eye on these aspects can help you identify early signs of damage before they escalate.
How to Identify Signs of Wear and Tear on Roofing Materials
While inspecting your roofing materials, focus on obvious signs of wear that may lead to leaks. Look for cracks, blisters, or curling edges on shingles or tiles, which all signal degradation. Pay close attention to the areas around chimneys, vents, and skylights, as these are often the most vulnerable points. Any rust or corrosion on metal components should also raise alarms, indicating that it’s time for some repair or replacement.
Tips for Spotting Hidden Damage and Defects
On your journey of conducting a roof inspection for leaks, hidden damage can sometimes be elusive. To effectively identify such issues, keep an eye out for the following:
- Water stains inside your home that could point to leaks.
- Mould growth in attic spaces as a sign of trapped moisture.
- Inspect the underside of your roof’s eaves for signs of damage.
Assume that a seemingly minor issue could signify a larger problem brewing beneath the surface.
Wear proper safety gear when climbing ladders and walking on your roof, as the risk of falling or getting injured is significant. Consider using a binocular for hard-to-reach areas if you are uncomfortable going up. Look in the attics for any signs of water stains or mould, as these often indicate hidden leaks. Be sure to check the flashing and seals around vents and pipes because these are common sources of hidden damage. Assume that vigilance will ensure your roof remains in good shape, protecting your home and finances.
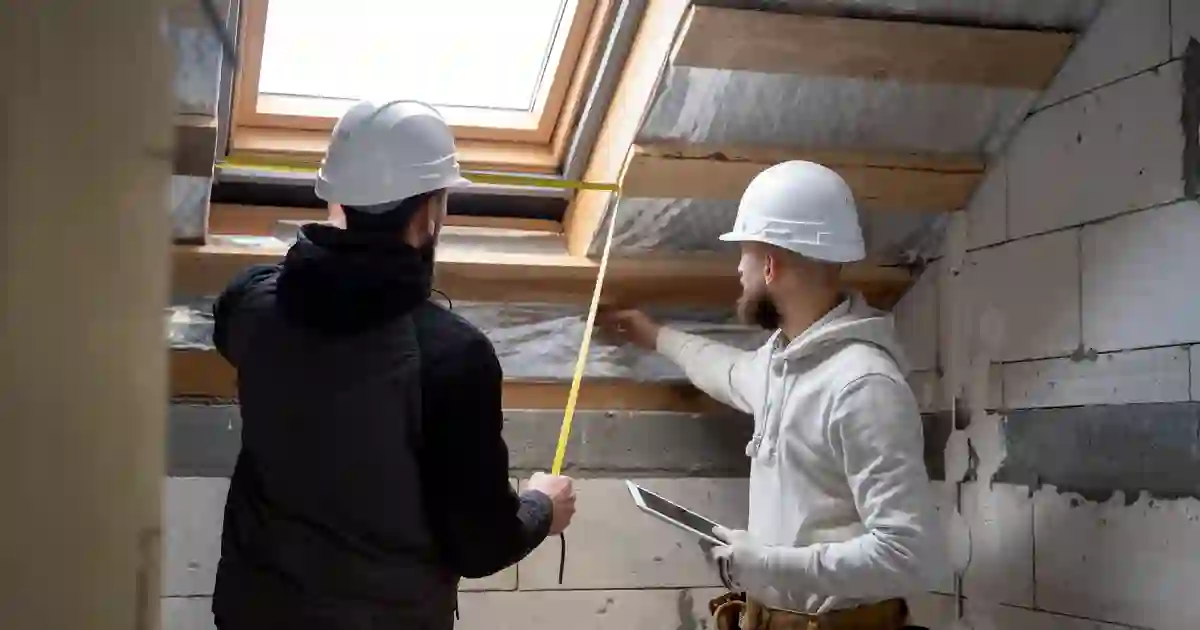
Inspecting Roof Penetrations and Flashings
Once again, conducting a thorough inspection of roof penetrations and flashings is necessary for identifying potential leak points. Check around chimneys, vents, and skylights, ensuring that all sealants are intact. For further insights, you can refer to this Effective Guide to Leak Detection: How to Spot Roof Leaks Early.
How to Check Vents, Skylights, and Chimneys for Leaks
One common leak source is around vents, skylights, and chimneys. Begin by inspecting the edges and checking for any gaps in the sealant or roofing material. Look for signs of moisture or damage within the interior near these openings, as this can indicate leakage.
Factors to Consider When Evaluating Flashing Conditions and Installation
While assessing the condition and installation of flashing, focus on several key factors:
- Material quality – Ensure flashing is made from durable materials
- Installation technique – Check for proper overlapping and sealing
- Signs of rust or deterioration – Identify any visible damage
Assume that any compromised flashing may lead to significant leaks if not addressed promptly.
Assessing flashing involves examining the proper alignment and installation to mitigate leaks effectively. Look into these factors:
- Flashing width – Must properly overlap and extend to avoid gaps
- Joints and seams – Must be sealed correctly
- Presence of debris – Ensure there’s no obstruction
Assume that poor flashing conditions can cause severe water damage to your roof.
Advanced Inspection Techniques
To enhance your roof inspection for leaks, consider incorporating advanced techniques. These methods can provide a comprehensive understanding of your roof’s condition.
| Technique | Description |
| Infrared Scanning | Detects moisture beneath the roof surface. |
| Moisture Meters | Measures the moisture content in roofing materials. |
| Drones | Offers a bird’s-eye view for hard-to-reach areas. |
How to Use Technology to Enhance Your Inspection
Techniques such as infrared scanning and drone technology can significantly improve your DIY roof inspections. By using these tools, you can accurately identify potential leaks or weak spots that may not be visible to the naked eye, allowing you to address issues proactively.
Tips for Detecting Leaks in Flat or Low-Slope Roofs
Detecting leaks in flat or low-slope roofs requires careful observation. You should always check for:
- Ponding water after it rains
- Cracks or blisters in the membrane
- Damaged flashing around vents or edges
Assume that if any of these issues are present, your roof may be susceptible to leaks.
Technology plays a significant role in identifying problems with flat or low-slope roofs. By using tools like moisture meters and thermal imaging, you can pinpoint areas of concern more effectively. Ensure to always inspect seams and joints, as these are typical weak points for leaks. If you observe anything unusual, it is vital to act swiftly to prevent further damage.
- Moisture meters for precise readings
- Thermal imaging for heat detection
- Vibration tests for hidden leaks
Assume that any delay in addressing these aspects may lead to more severe issues with your roof’s integrity.
Documenting and Reporting Findings
All aspects of your roof inspection for leaks should be meticulously documented. This documentation will serve as a valuable resource for future maintenance and provide insights for any repairs needed. Ensure you keep a detailed record of the areas inspected, the condition of each section, and any specific issues encountered. Clear and precise reporting will facilitate better communication with contractors or maintenance professionals when discussing necessary repairs.
How to Create a Comprehensive Inspection Report
Create a detailed inspection report that encompasses all findings from your DIY roof inspections. Include photographs of problematic areas, along with descriptions of the observed issues, such as leaks, wear and tear, or potential hazards. This report should be organised chronologically and categorically, making it easier for you or any involved parties to assess the situation accurately.
Factors to Consider When Prioritising Repairs and Maintenance
Inspection of your roof should lead you to assess various factors when prioritising repairs and maintenance. Take into account the severity of leaks, the age of roof materials, and the potential impact on your home. Other necessary factors include safety concerns, visible damage, and whether further leaks could cause more extensive problems. Assessing these elements will make clear which repairs require immediate attention.
- Severity of leaks
- Age of roof materials
- Potential impacts on the home
- Visible damage
- Safety concerns
Documenting the inspection findings will enable you to have a thorough understanding of your roof’s condition. When evaluating your roof for leaks, consider the environmental factors like weather patterns and foliage around your property. Assess how these could impact your roof’s integrity over time. Regularly document changes and trends observed in your roof’s condition for a more informed future inspection process.
- Environmental factors
- Weather patterns
- Foliage around the property
- Changes in roof condition
- Trends observed
Roof Inspection for Leaks Conclusion
With these considerations, conducting an effective roof inspection for leaks is necessary for maintaining the integrity of your home. By following this step-by-step guide, you can easily perform DIY roof inspections to identify potential issues before they become significant problems. Regular checks can save you time, effort, and money in the long run. Stay proactive in ensuring your roof remains leak-free and keep your living space safe and dry.
FAQ
Is it normal for a roof to leak in heavy rain?
Although heavy rain can test the limits of your house’s exterior, it’s not normal for a roof to leak under these circumstances. A properly designed, installed, and maintained roof should provide a reliable barrier against this kind of weather. If you’re encountering leaks during periods of heavy rain, it could indicate issues like damaged shingles or inadequate sealing in place. It is advisable to seek professional help for assessing and remedying the situation before it results in extensive water damage to your home interior.
What area of the roof is most likely to leak?
Roofs can potentially leak from any spot, but there are certain areas where leakage is more likely to happen. For instance, roofs are often vulnerable around penetrations such as vents and chimneys, due to the breaks in the roof’s surface. Roof valleys, or the places where two planes of a roof intersect, can also be leak-prone. Moreover, roof edges and flashings, particularly in stormy weather conditions or heavy rains can experience leaks too. Remember that regular professional inspections may help prevent such issues before they lead to significant damage.
How to fix a leaky roof without replacing it?
Fixing a leaky roof without having to replace it depends on the extent and nature of the damage. Simple repairs like replacing a few damaged shingles or applying roofing cement might suffice in some cases. If you have metal flashing around chimneys or vent pipes, consider resealing their edges with roofing cement for added protection against leaks. Furthermore, clear any blockages from your gutters and ensure they are well-maintained as clogged gutters can also cause water to back up and possibly lead to roof leaks. Remember these fixes are temporary; always consult with a professional roofer if leaking persists as this could indicate more serious underlying issues.